Serving as vigilant electronic eyes, CCTV systems are indispensable tools which capture crucial visual evidence in crime investigation. However, not all cameras are equally effective in aiding investigations. Identifying the right cameras, strategically placed in an area, can significantly enhance crime-solving capabilities. By employing MAPOG tools, law enforcement can efficiently identify CCTV cameras that are strategically positioned to capture valuable evidence crucial for solving crimes. In this article, we explore how MAPOG can be utilised in Mapping CCTV Camera for Crime Tracking in an area.
Key Concept–Mapping CCTV Camera for Crime Tracking
Utilising MAPOG tools enables us to generate a map highlighting CCTV cameras with the potential to capture visuals of specific locations. MAPOG is employed to visually depict all CCTV cameras installed across a city. By employing the Create Point Data tool, we can precisely mark the location where a crime occurred on the map. The Buffer tool assists in identifying cameras situated at an appropriate distance from the crime scene, capable of capturing relevant visuals. Explore other captivating articles on our blog like CREATING BUFFER MAPS TO IMPROVE THE SECURITY OF AIRPORTS AND OTHER INFRASTRUCTURES, Creating Safe Routes for Armies and Rescue Teams etc., offering an enriching read!
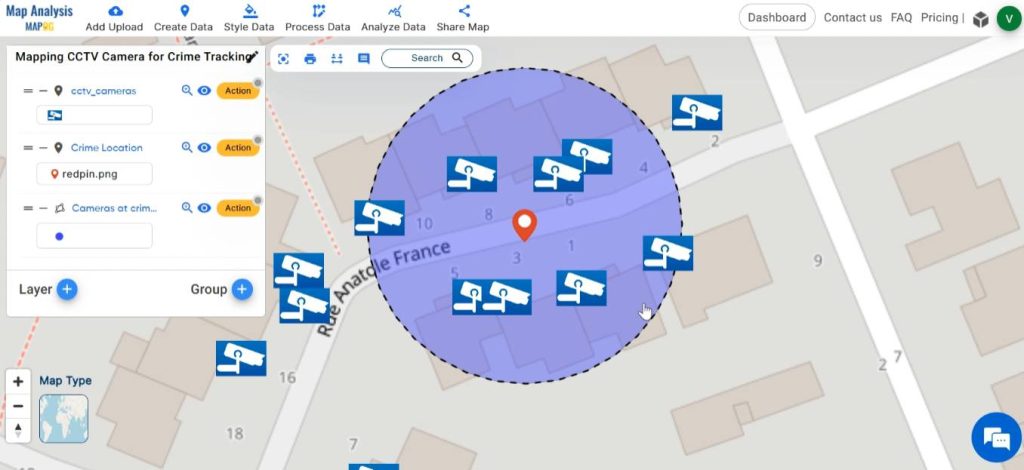
Follow the below process Step-by-step for Mapping CCTV Camera
Step 1: Open Map Analysis
Navigate to Map analysis interface from MAPOG platform.
Step 2: Upload data
At first add the data of CCTV camera locations to the map. For this click on the Add Upload option from the menu bar at the upper left end, and then go to the Upload Excel/ CSV Files option.
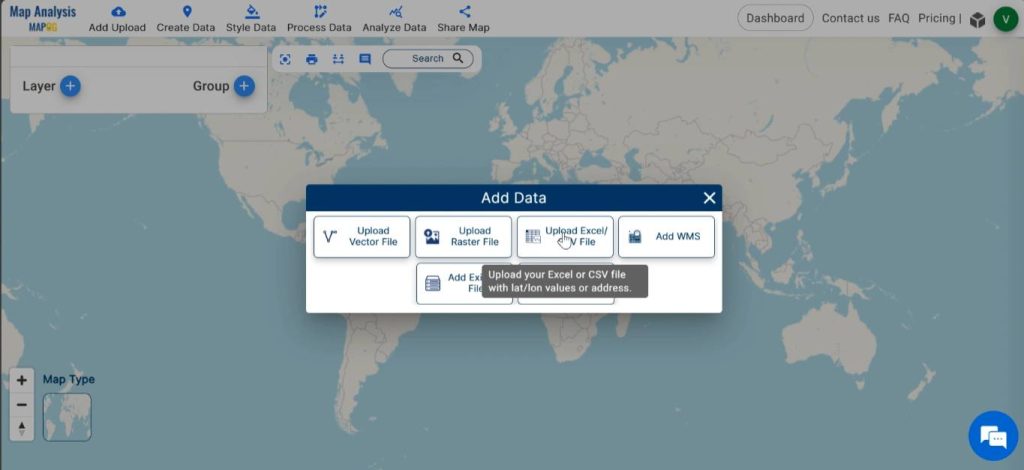
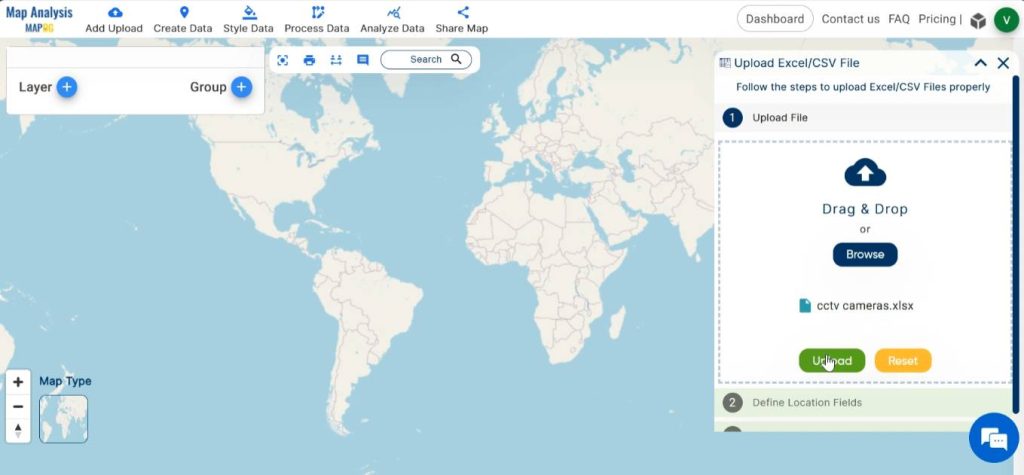
Browse the file within the system containing CCTV location data and click on Upload.
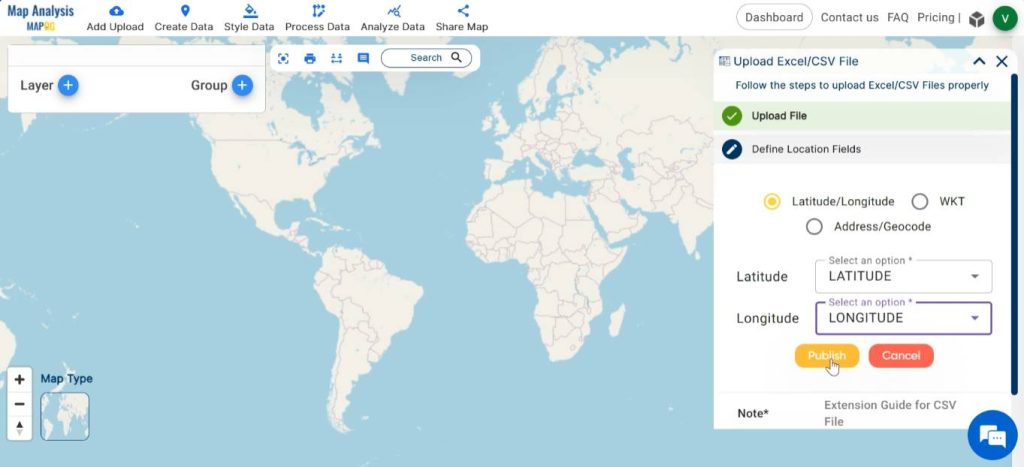
The file may include location information represented as latitude-longitude, WKT, or addresses. Based on the type of information present in the file, select the appropriate format in the Define Location field. Next, identify and select the column header in the Excel sheet that contains the relevant data. Finally, click on publish to display the CCTV points on the map.
Step 3: Save map
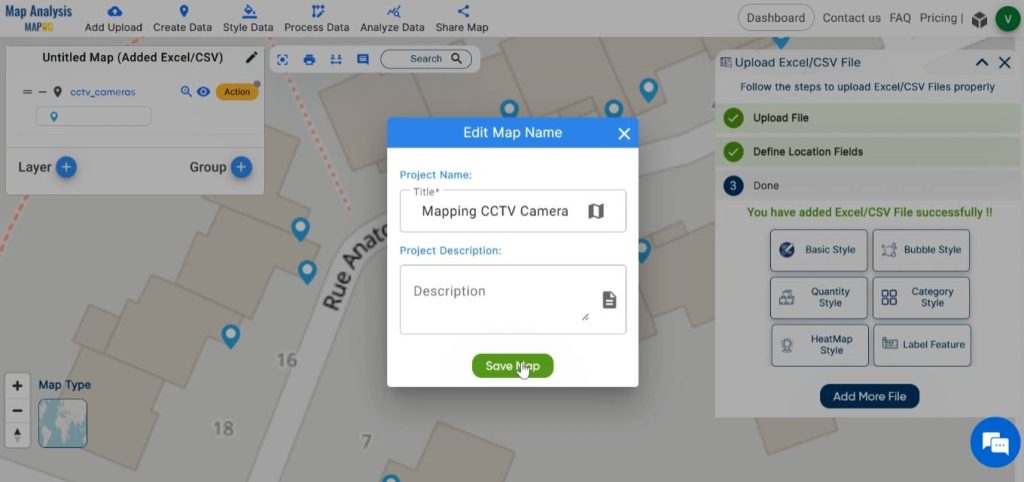
Now save your map with a suitable name. For this, click on the pencil icon near the “Untitled Map” text. Enter a suitable name, and if desired, provide a brief description of your project. Finally, save the map by clicking on the “Save Map” button.
Step 4: Modify Layer
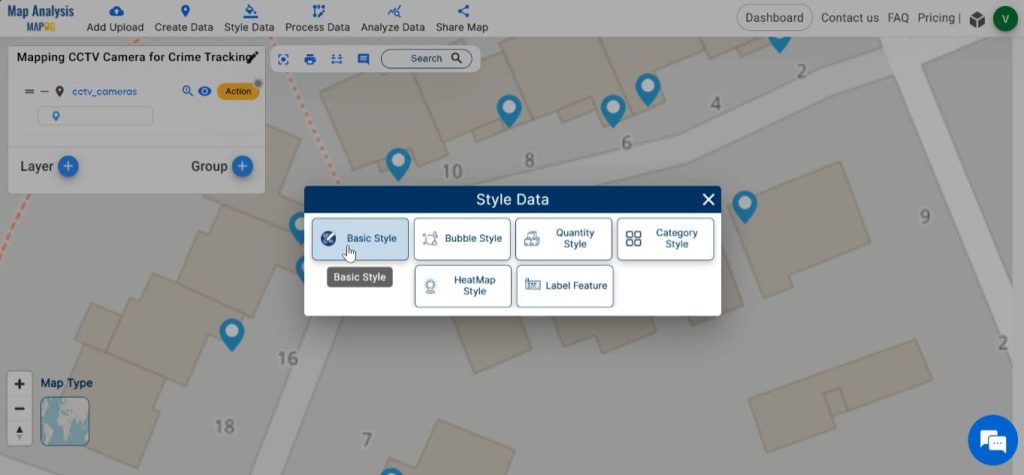
For styling the layer, click on Style Data and then select Basic Style.
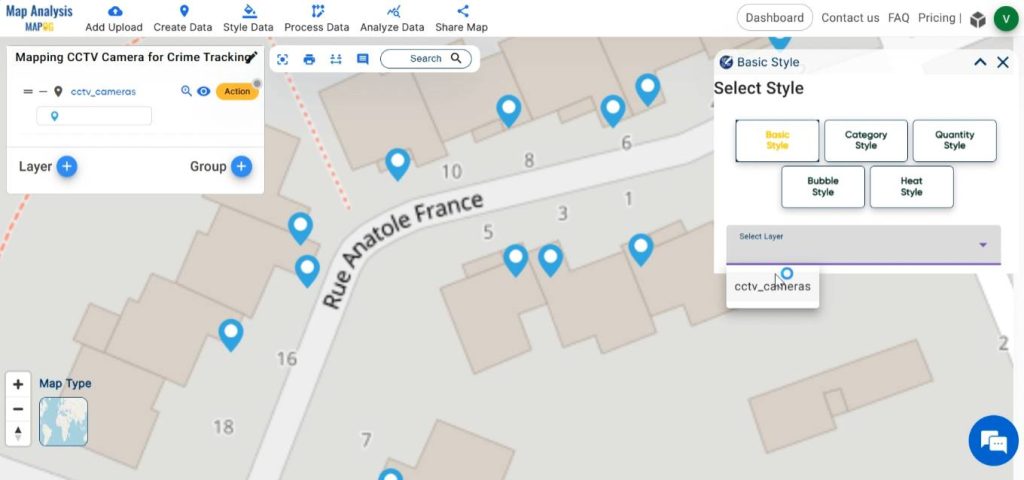
Select the CCTV camera layer.
Either choose any of the given icons in the list or you can add your own icons. For customising icons click on Add icon, then browse the icon from file.
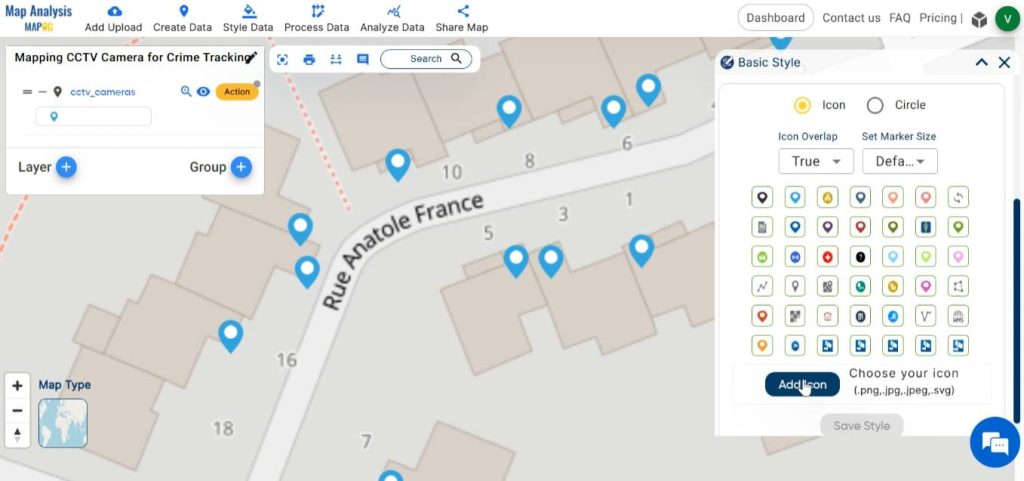
Using the Set Marker Size option the size of the icon can be adjusted. Finalise the style by clicking on Upload & Save.
Step 5: Base Map Selection
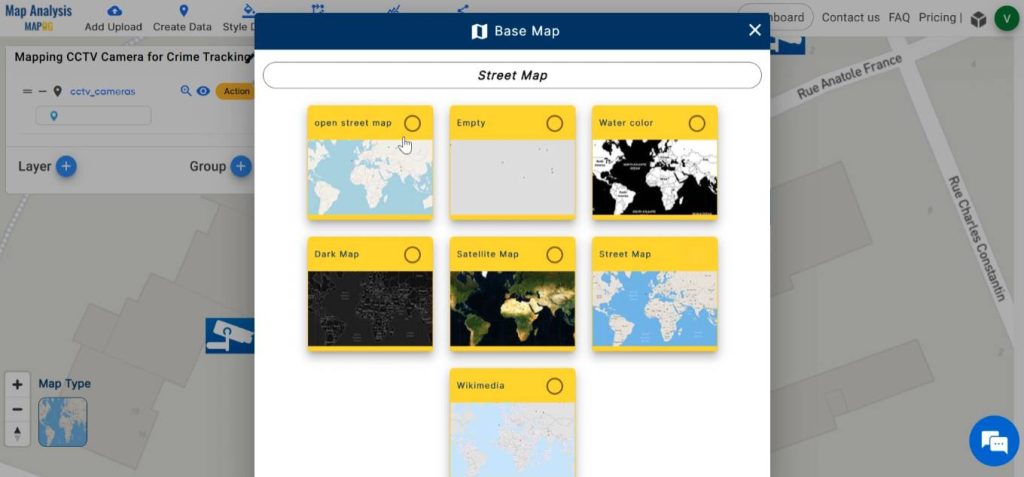
MAPOG offers a range of base maps to facilitate your analysis. Explore and select from these base maps by clicking on Map Type located at the bottom left corner. Once accessed, simply click on the desired base map to make your decision.
Step 6: Plot Crime Location
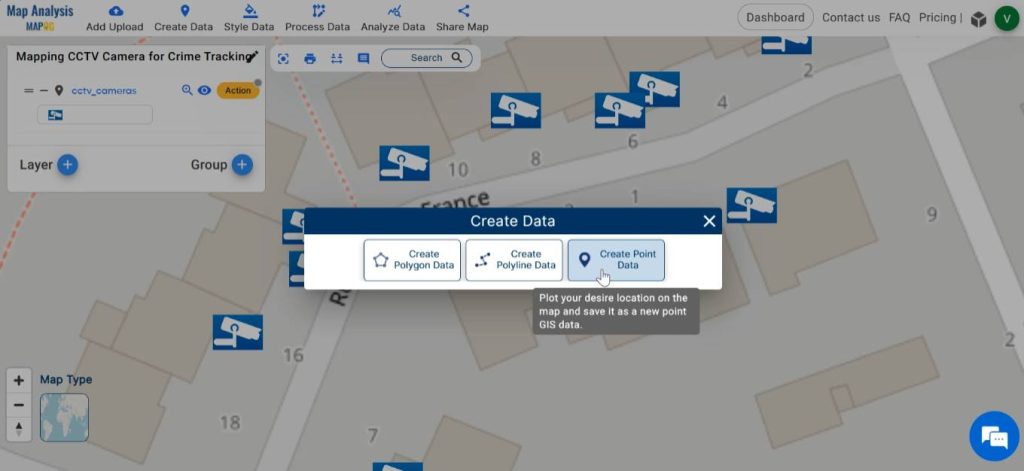
In order to plot the exact location at which the crime has happened, click on Create Data and select Create Point Data.
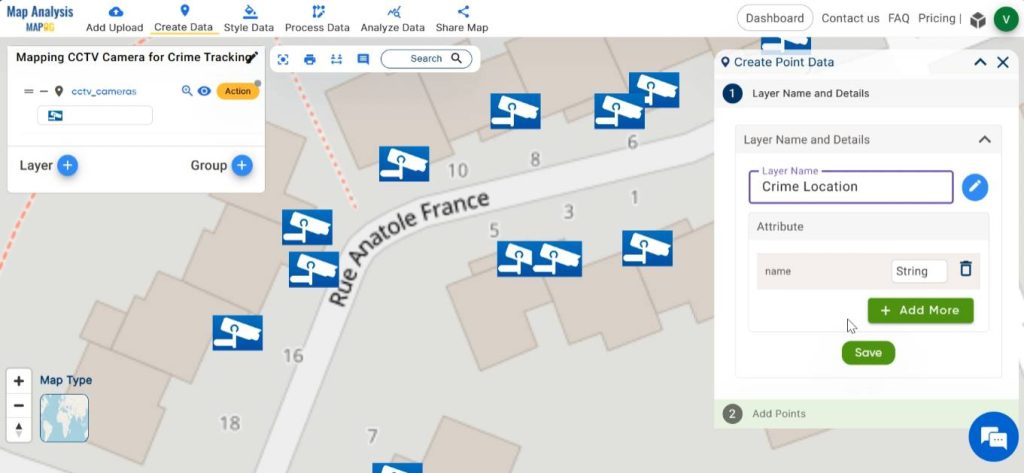
In the dialogue box, enter a suitable name for the point layer and also add the necessary Attribute in the data table. Click on Save to save the layer.
From the given icon list, choose a suitable icon.
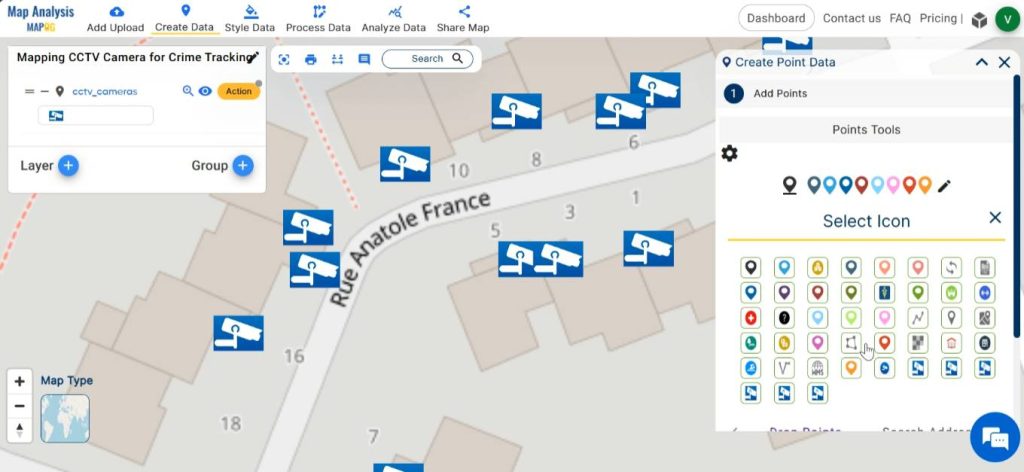
To add points, we have three methods available. We can drop a point directly onto the map, use the address of the location, or input the latitude and longitude coordinates. For this task, let’s drop points directly onto the map. Click on the precise location where the crime occurred, then click on Add to confirm the addition.
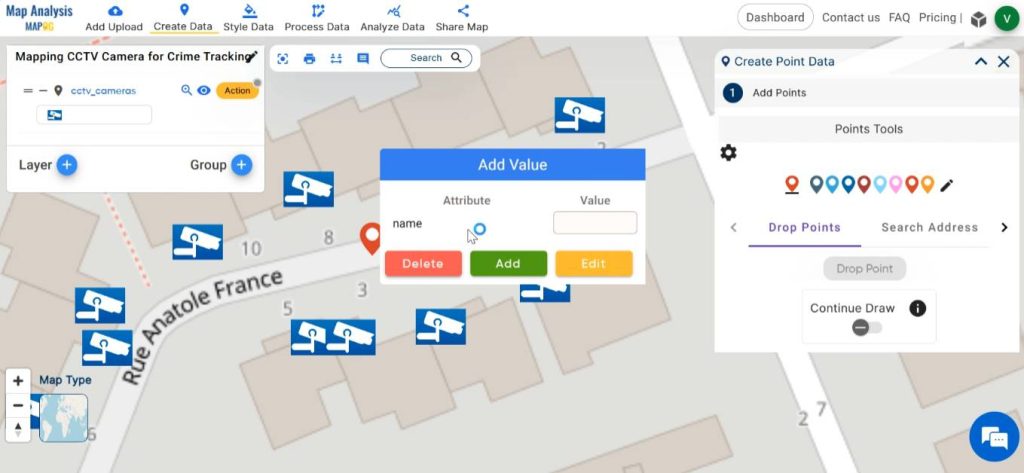
Step 7: Create Buffer
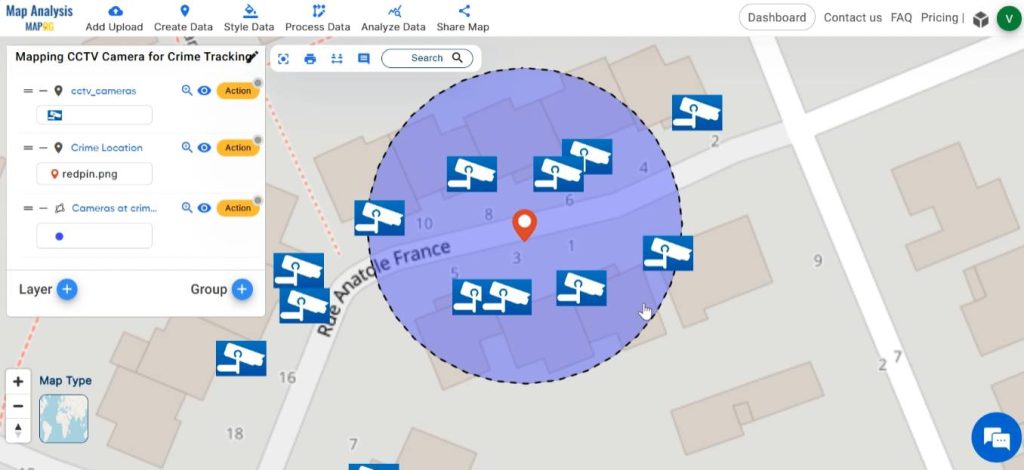
For identifying the CCTV cameras that are relevant in crime tracking, we can create a buffer zone of suitable range around the crime location. To do this, click on Process Data and select the Buffer tool.
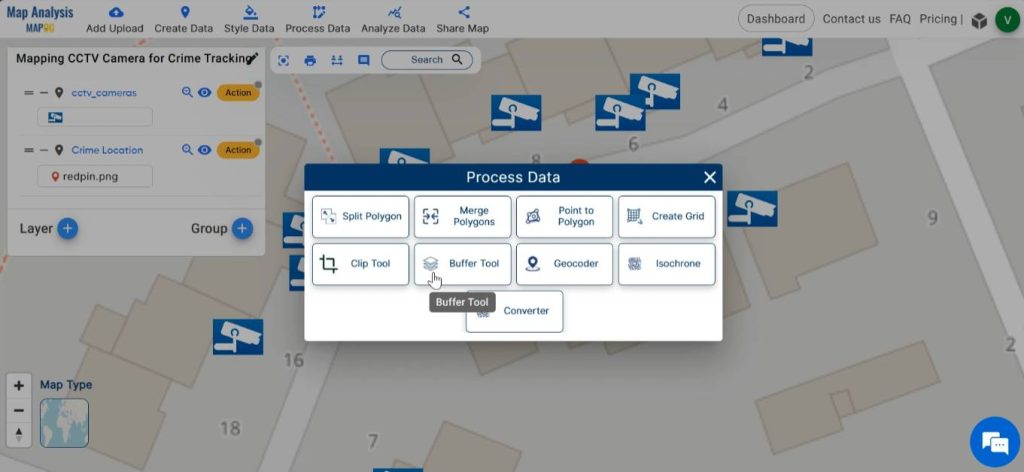
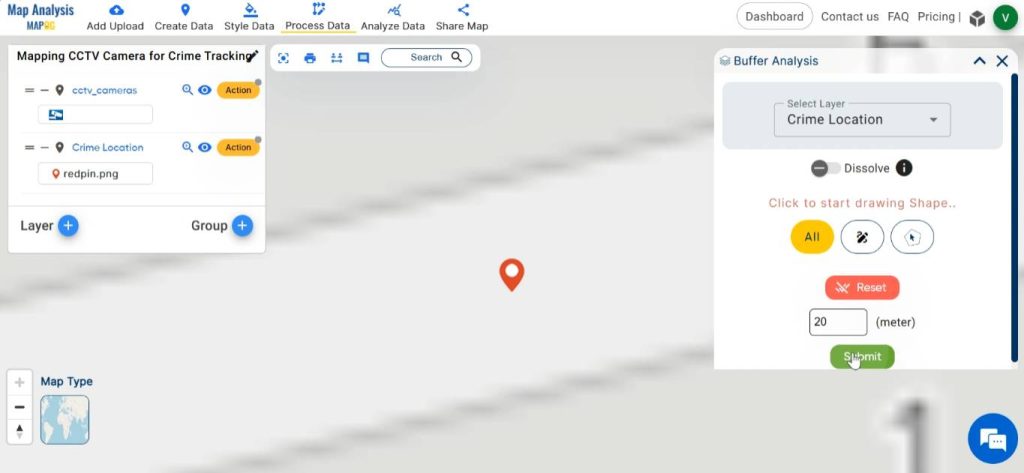
Select the Crime location layer and enter a suitable range for the buffer zone. Then, click on submit.
Step 8: Rename Layer
To rename the created buffer layer, click on Action followed by the pencil icon. Enter the appropriate name for the layer and click on Save.
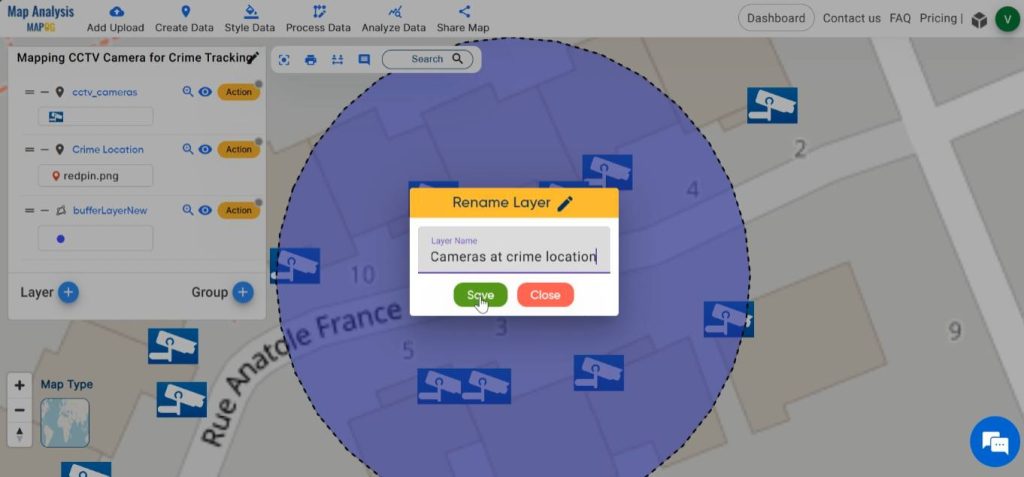
Finally, we have created a map that aids in tracking the crime by pinpointing the CCTV cameras near the crime location that can provide relevant visuals for the investigation.
Step 9: Share the Map
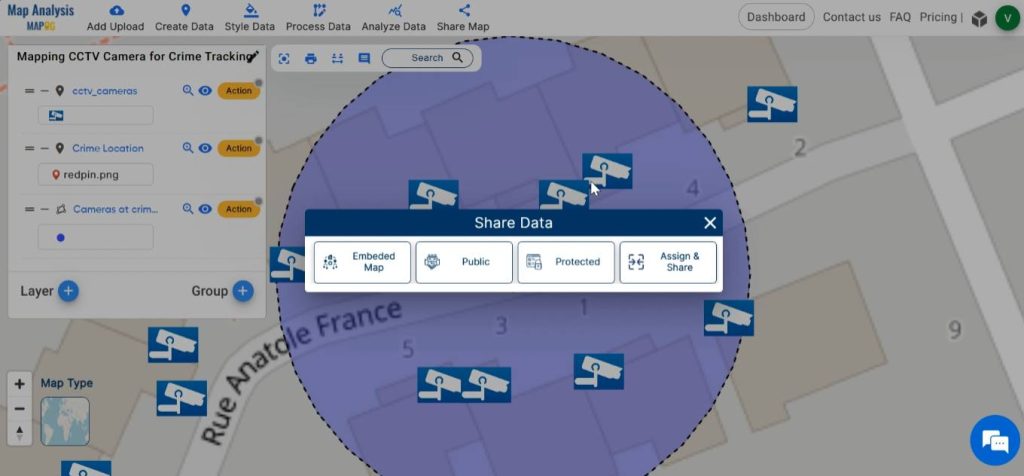
Using the Share tool, share the map with your friends or post it on social media.
Major Findings–Mapping CCTV Camera for Crime Tracking
- Location of Camera: The map reveals the precise locations of all CCTV cameras in the area. Thus, helps in identifying potential sources of surveillance footage relevant to the crime.
- Coverage Area: Investigators can determine the extent of coverage provided by each camera, which helps in understanding which parts of the crime scene or surrounding areas are under surveillance.
- Ownership and Access: It helps investigators understand who has access to the footage and the procedures for obtaining it legally.
Industry and Domain
- Law enforcement Agencies: They can more efficiently gather evidence and investigate crimes, potentially leading to quicker resolutions.
- Government authorities: they can use the insights provided by this analysis to make informed decisions responsible for public safety and security.
- Communities: Residents and businesses in the area covered by the CCTV network can benefit from improved crime prevention and response.
Conclusion–Mapping CCTV Camera for Crime Tracking
In conclusion, the convergence of MAPOG and CCTV camera analysis offers a powerful toolkit for crime tracking and law enforcement. By plotting CCTV locations, mapping crime incidents, identifying relevant footage, and analysing spatial data, investigators can unravel complex criminal cases and bring perpetrators to justice.
Explore more content on our blog:
Protecting Wetlands: Guide to Create GIS Map for Nature
GIS Analysis in Urban Planning: Reshaping Transportation Future Insights of state/city
Fast Emergency Response: Using GIS and Isochrone Maps for 10-Minute Ambulance Arrival