In order to successfully plan and carry out development at this bustling aviation hub, “Simplifying Transfer Service to Airport: Using Route Compass Tool” improves accuracy and efficiency in the surveying process. Users and experts use MAPOG‘s Route Compass map for precise surveying at an International Airport, optimizing topographic assessments and safety considerations in the intricate landscape.
Start your adventure by deciphering the mysteries of “Protecting Wetlands: Guide to Create GIS Map for Nature” in which GIS is shown to be a formidable protector of delicate wetland ecosystems.
Key Concepts to Navigate Construction at Airport with Route Compass
A way that we find from Transfer service to Airport is the path that we want to make it simple. This map is definitely given a thematic overtone, which is an important detail for the route instruction. Let us be your guide in creating the map that will be an instrument for responders during MAPOG disaster response. Now let’s get started!
Steps to Create a Construction Survey with Route Compass Tool In MAPOG
Step 1: Open Route Compass Tool
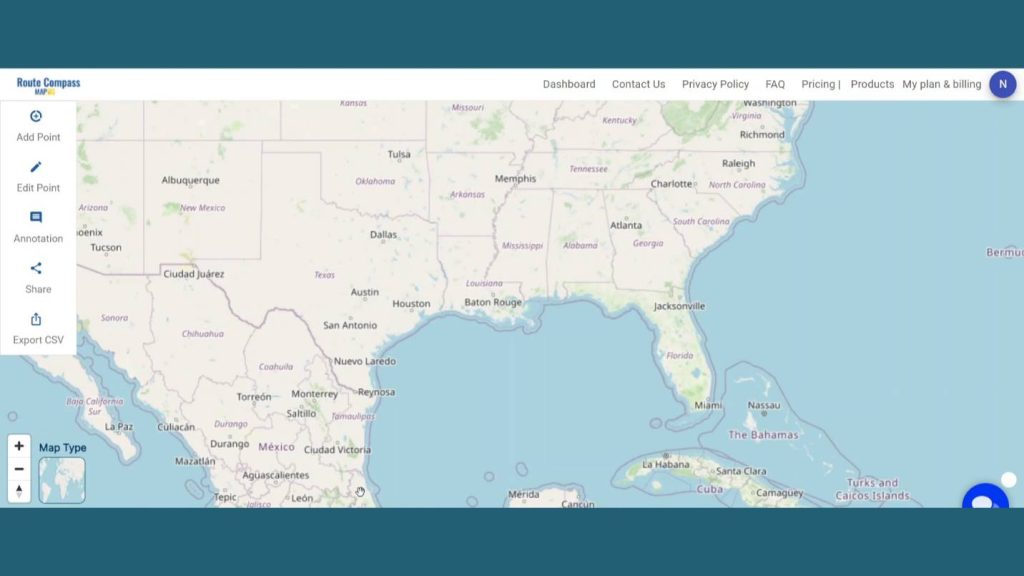
First, Navigate to the Route Compass Tool Interface.
Step 2: Add Points:
Now, after coming to the Route Compass interface you’ll see the Add point button on the upper left corner. After that click on the Latitude & longitude button and search for the location you desire. Here I’ve searched for the Bus and coach company as I’m making a construction survey Route from a Bus coach company to the airport.
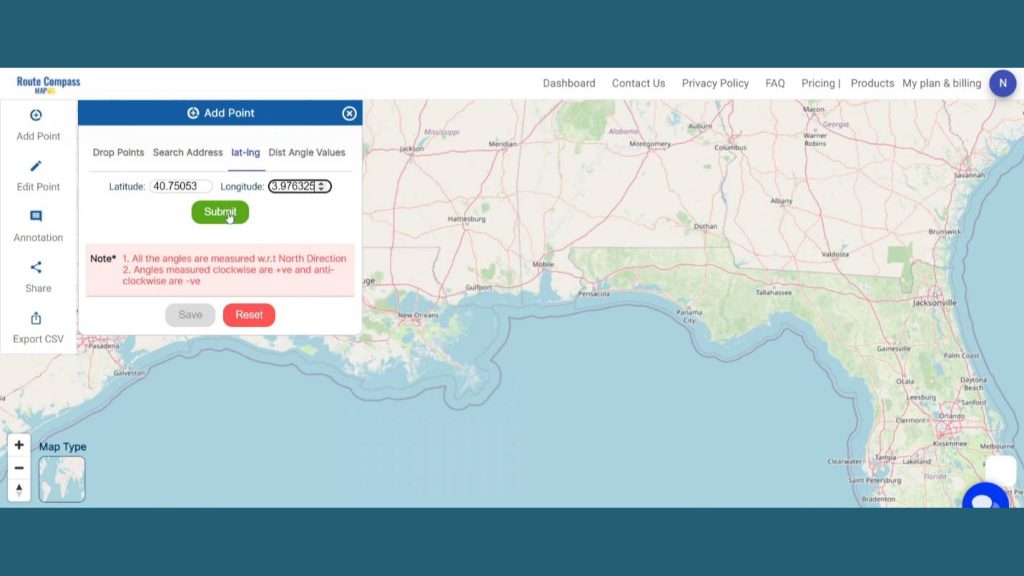
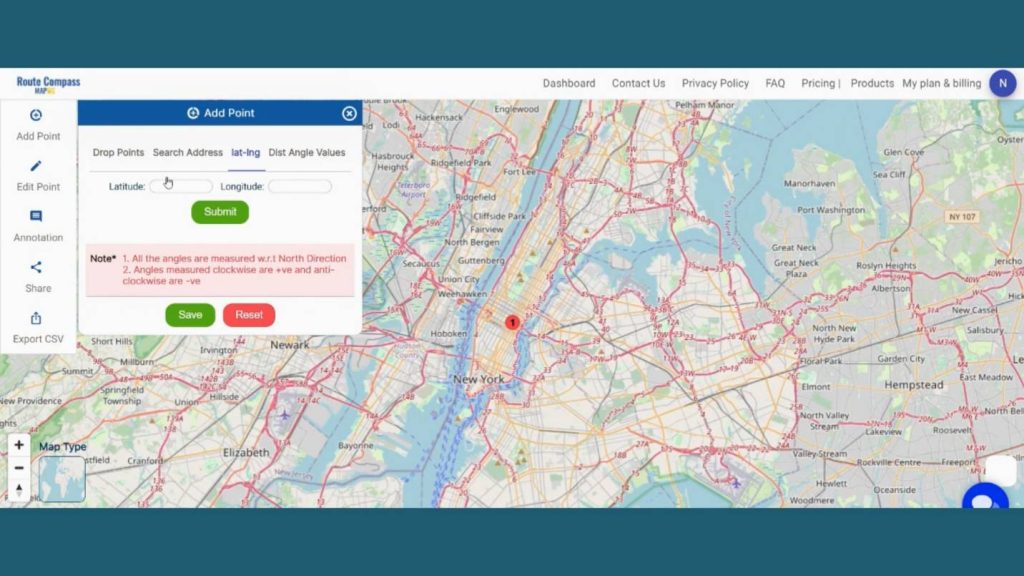
After providing the latitude and longitude and by clicking submit a point will be dropped there. That is our first point.
Step 3: Create Routes
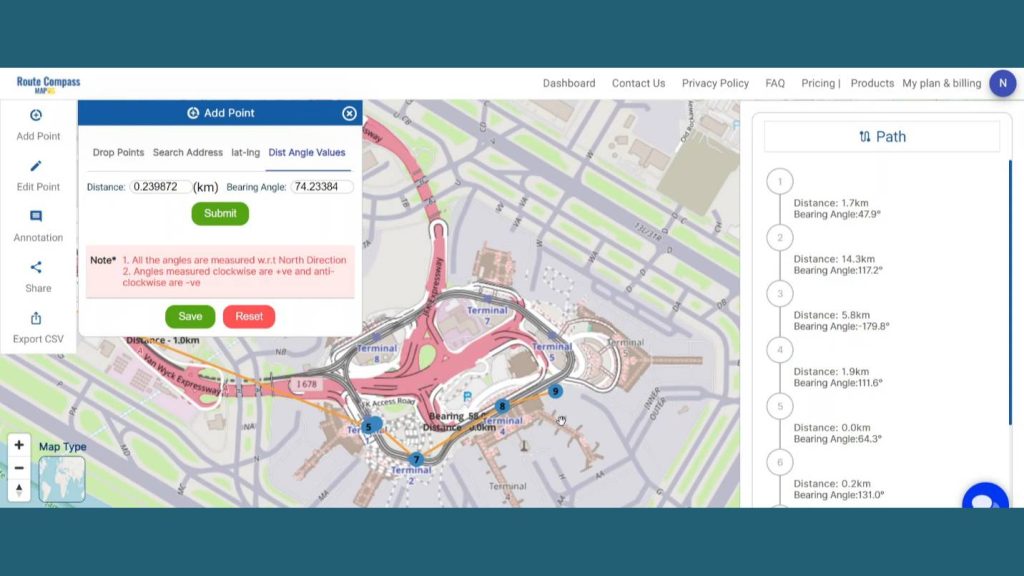
Now, let’s add the way points as per our source and destination. Here Source Is the Bus and coach company and the destination is Airport. We are going to put nearly 7 waypoint areas in the map that are very important & related to the under construction survey using the Latitude & longitude and Distance and bearing angle method.
Step 4: Save Route Map
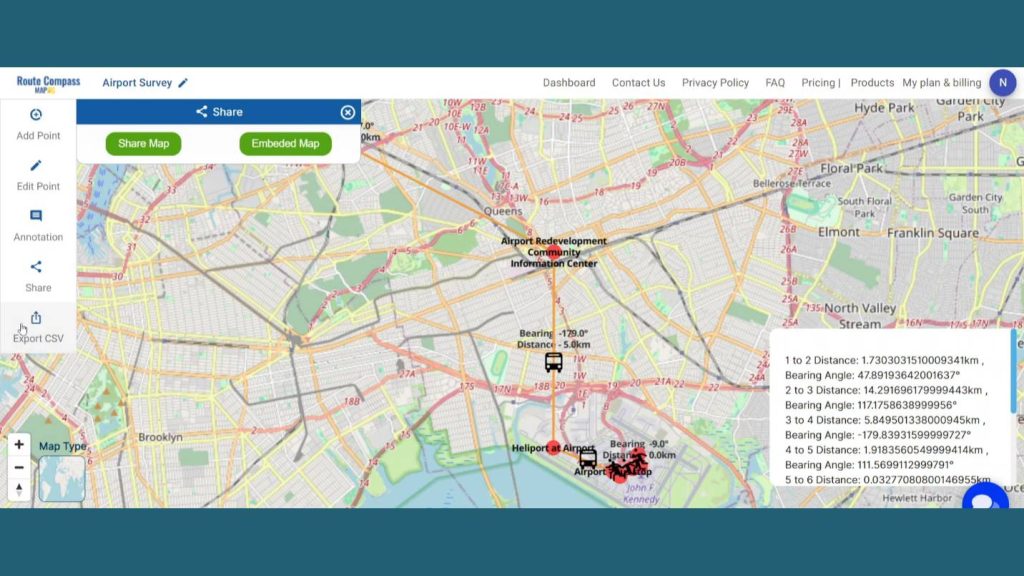
After finishing the routes click on the save button showing the left side of the screen in the add points button. By clicking the save button a dialogue box will open. Give the proper project name and description related to the project and click on create map. And the map will be saved. You can even view the distance and bearing angle between 2 points on the right side of the screen. It helps the user to get more detailed information about the route they are creating.
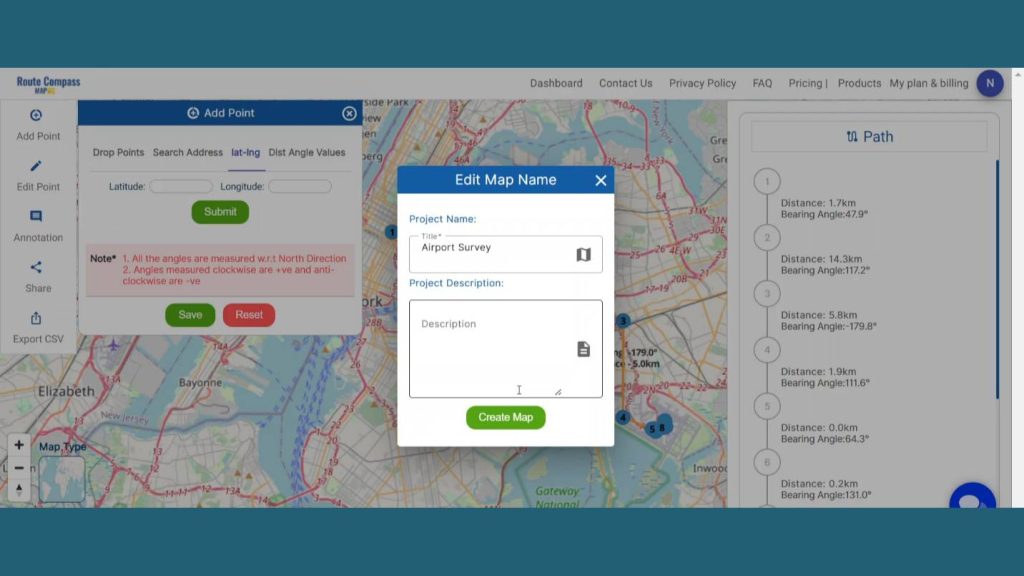
Step 4: Edit Text
To add any text by the points, Go to the Edit Point option on the left side of the map canvas. It lets the user change the labels of the waypoints for better understanding.
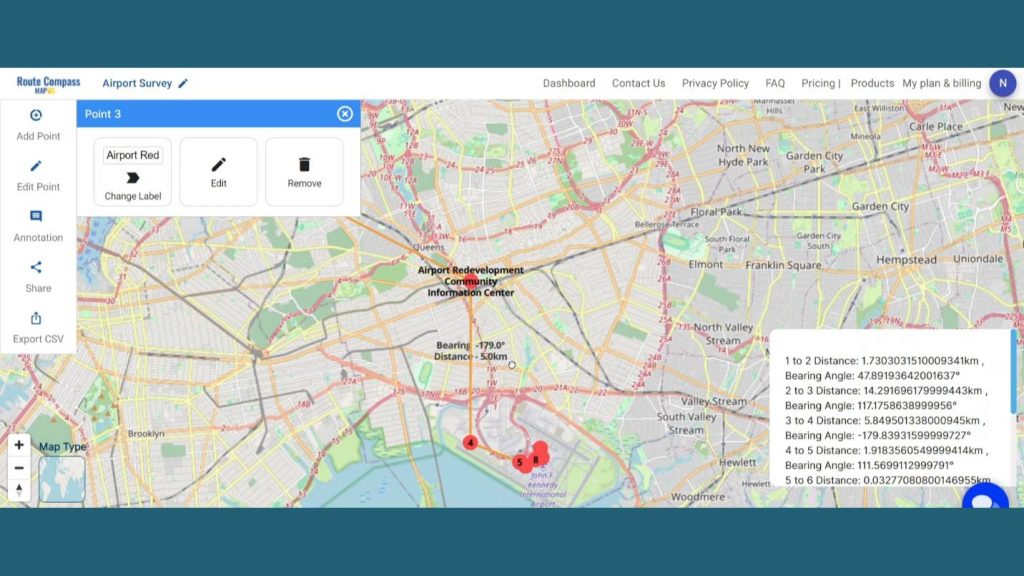
Step 5: Add Icons for better explanation
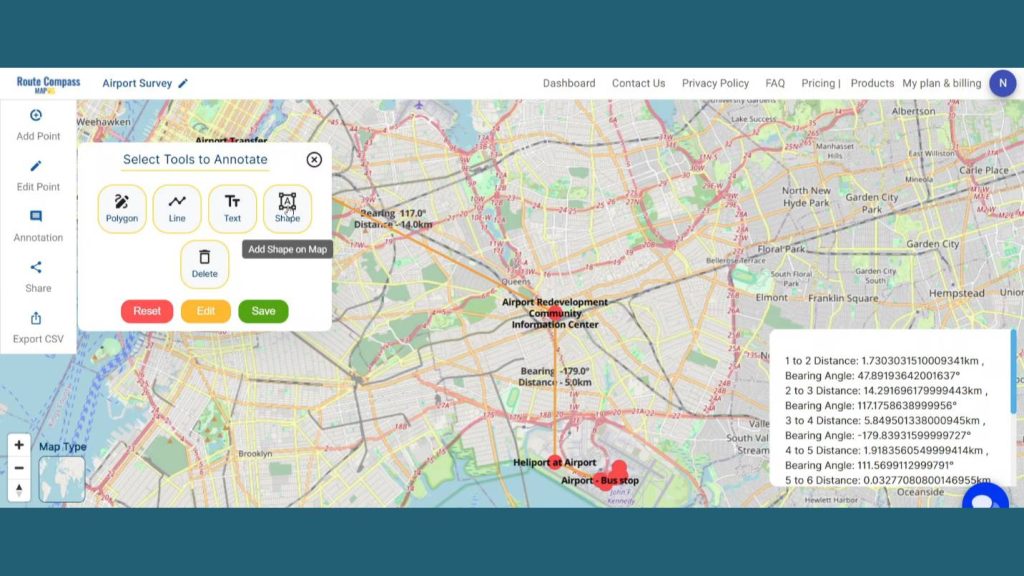
Additionally, MAPOG gives the opportunity to enhance the map by adding the Icons. First go to the Annotation option and click on the shape button.
An icon box will open on the screen. Then you can search for a particular icon and drop it on the map. This lets the user explain the exact use of any particular path or location to provide context to the audience. Lastly click on save to save the entire route with labels and icons.
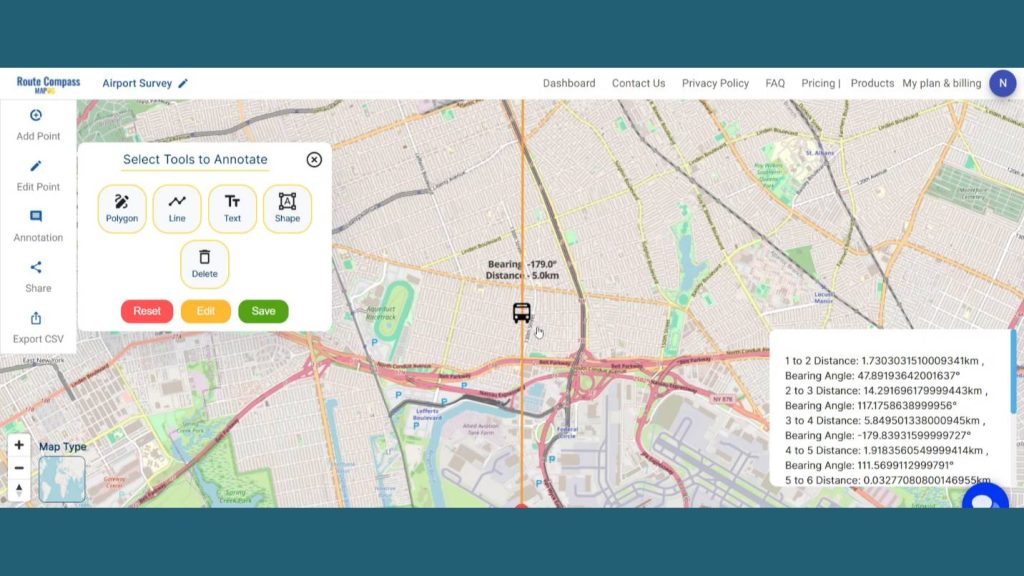
Step 6: Share Route Map
Users can even share their map by clicking the share button. There are two options. By share map users can Send or post it in their social networks by copy link option or preview option.
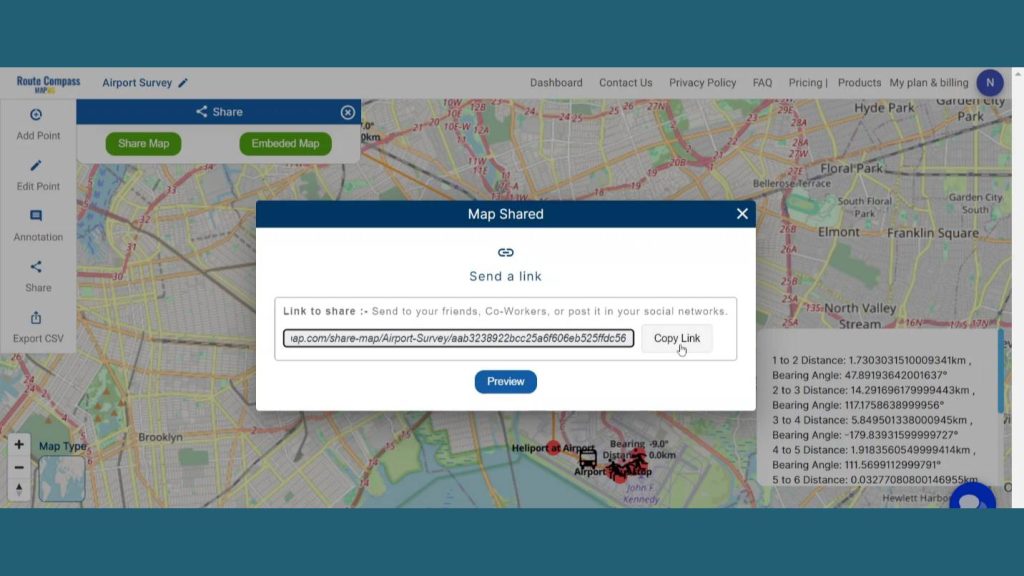
And by embedded map option users can Insert their map into your blog, website, or simple application by using copy html option.
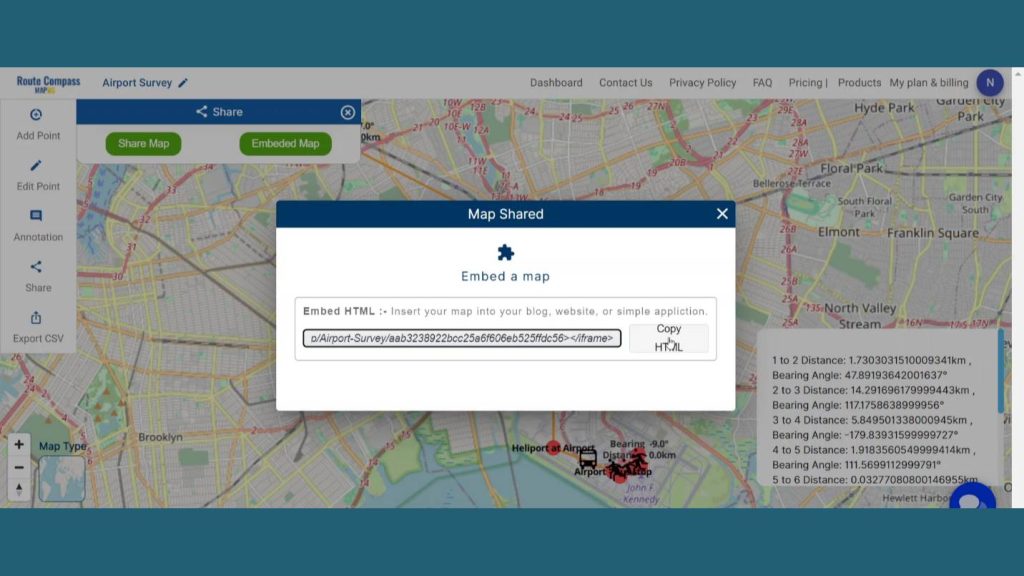
Here is an Export CSV option that lets the user download the route data for further uses. The data come with all the details like distance latitude, longitude and bearing angle.
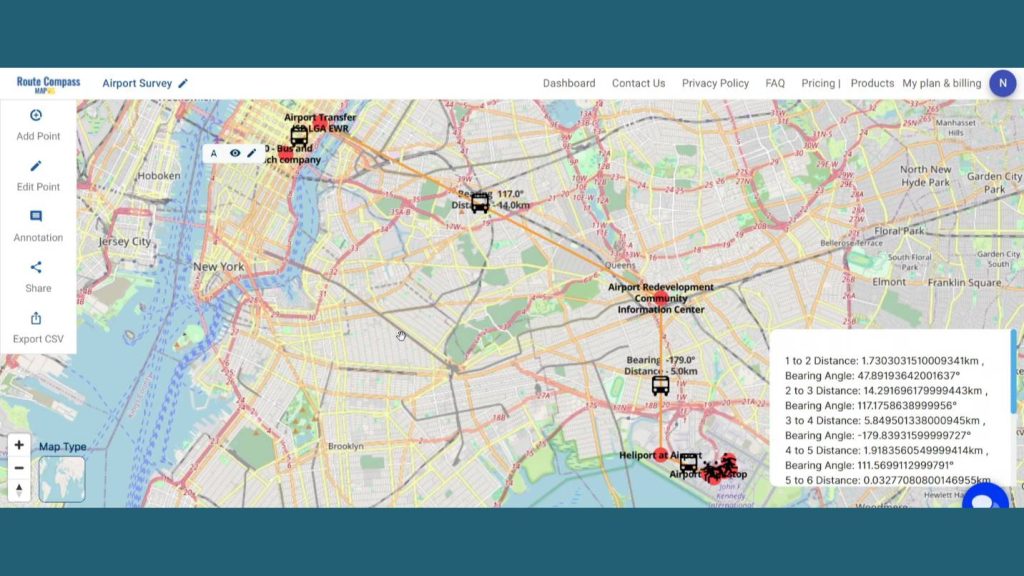
Step 7: Results & Analysis
With our map now enriched with details, let’s make those final adjustments. You’ve just crafted a thematic ROUTE map, a valuable asset for Precision Planning, Efficient Execution, and Safety Optimization and beyond.
Major Findings
Dynamic Airport Environment: The construction site survey at Airport involves navigating through a dynamic and bustling airport environment with multiple terminals, runways, and facilities, requiring careful planning and adaptability.
Varied Terrain and Infrastructure: The survey must account for the diverse terrain and existing infrastructure at Airport, including runways, taxiways, and terminal buildings. Route Compass in MAPOG assists in planning routes that navigate this intricate landscape.
Safety and Security Measures: Construction site surveys at an international airport demand strict adherence to safety and security measures. Route Compass aids in planning routes that prioritize safety and avoid sensitive areas, ensuring a secure working environment.
Domain and Industry
This map is such a powerful means to cope with the changes of a site, ensuring worker safety, preventing operational disruptions, following environmental regulations, and showcasing technologies.
As the narrative unfolds, venture into the realm of urgent response with “Fast Emergency Response: Using GIS and Isochrone Maps for 10-Minute Ambulance Arrival“
Conclusion
As such, “Simplifying Transfer Service to Airport: Using Route Compass Tool” has proven to be the most crucial in my effort to gear for a high-detailed non-linear route for building a survey.
Thus, in short, the MAPOG’s Route Compass app serves as a functional tool for all those filling the shoes of an Outdoor Surveyor, offering a full range of functions including planning their trips and the navigation in the quite diverse landscapes.
Here are some other blogs you might be interested in
- GIS Analysis in Urban Planning: Reshaping Transportation Future Insights of state/city
- Mapping Tiger Attack Hotspots – Create an Online Map and Share
- Make Routes for Military Aerial Planning- Through Bearing angle and Distance calculation – Online Route Compass
- Mapping Healthcare Efficiency: GIS Buffer Analysis of Hospital Locations
- Add WMS- Two step online view of WMS layer on a map
- Plot ATM locations on a map and embed on your website
- Map habitat locations of endangered animals & keep track of their living